View model w Magento 2
View Model w Magento 2, model widoku, jest abstrakcją widoku, który wymienia informację z modelem, zaś sam dostarcza potrzebne treści i zachowania. Model widoku pozwala na odseparowanie warstwy połączonej do wyświetlania danych od metody renderującej, która jest obsługiwana przez bloki. Oddzielenia funkcji i logiki biznesowej z klas bloków do oddzielnych klas, sprawia, że takie klasy są łatwiejsze w utrzymaniu, testowaniu i ponownym użyciu.
Różnica pomiędzy klasą bloku a klasą modelu widoku
W Magento 1 mieliśmy tylko bloki, tak od Magento 2 mamy dodatkowo view model (od wersji 2.2). W notce o blokach opisano proces tworzenia, jego definicję w pliku xml layoutu oraz wykorzystanie z templatami .phtml. Jeśli chodzi o model widoku, to jest to nowa strategia dostarczania danych do templat PHTML. Z punktu architektonicznego, klasy bloków robią zbyt dużo rzeczy. Porównując oba typy klas:
- Klasa bloku zawsze dziedziczy po rodzicu:
- Klasa view modelu pozwala na czysty start:
Jak już wspomniano, celem klasy bloku wyświetlenie danych. Może to być za pomocą konfiguracji layoutu, gdzie ustawiamy klasę z templatą PHTML. Wystarczy użyć klasy bloku Magento\Framework\Element\Template lub stworzyć nową klasę bloku dziedziczącą po niej. Zawartość bloku możemy również wygenerować bezpośrednio i wywołać na jej obiekcie metodę toHtml().
W większości przypadków bloki wykorzystują szablony, a do ich obsługi potrzebujemy dodatkowych metod. Dlatego, jak najbardziej sensowne jest skorzystanie tutaj z mechanizmu dziedziczenia. Tym sposobem, klasa bloku zawsze ma przynajmniej jeden powód, by istnieć: wyświetlić zawartość. Dodając jednak kolejne zależności do konstruktora klasy bloku, dodajemy mu więcej odpowiedzialności, co burzy zasadę pojedynczej odpowiedzialności. Zaradzić temu możemy właśnie przez wykorzystanie view modelu.
Definiowanie view modelu
Jeśli potrzebujesz wyświetlić np. kolekcję produktów w szablonie, możesz użyć domyślnej klasy bloku, to jest:
- Dla frontu jest to zwyczajowo klasa: Magento\Framework\View\Element\Template,
- Dla admina jest to klasa: Magento\Backend\Block\Template.
W przypadku większych modyfikacji reguł renderowania dla bloku — tworzysz nowy blok (zgodnie z regułą SPR).
Wykorzystanie modelu widoku wymaga:
- Stworzenie klasy widoku modelu,
- Wstrzyknięcie view modelu do klasy bloku w konfiguracji layout,
- Wykorzystanie modelu w templacie .phtml.
Konwencja jest taka, że klasy view modeli umieszczamy w osobnym katalogu, ViewModel. Następnie wystarczy, że utworzona klasa implementuję poniższy interfejs:
|
1 2 3 4 5 6 7 8 9 10 11 12 13 14 15 16 17 |
<?php /** * Copyright © Magento, Inc. All rights reserved. * See COPYING.txt for license details. */ namespace Magento\Framework\View\Element\Block; /** * Block argument interface. * All objects that are injected to block arguments should implement this interface. * * @api * @since 101.0.0 */ interface ArgumentInterface { } |
Skoro klasa widoku nie musi dziedziczyć po innej klasie, to dodajemy tylko takie zależności jakie potrzebujemy. Przyjrzymy się przykładom.
Prosty przykład
Stwórzmy prosty przykład, który na każdej stronie będzie wyświetlał napis „Hello!” obok loga:

Moduł nazwałam Anna_ViewModelExample. W katalogu modułu utworzyłam folder ViewModel, gdzie dodałam klasę Hello, którą ma pojedynczą metodę saySomething():
|
1 2 3 4 5 6 7 8 9 10 11 12 13 14 15 16 |
<?php declare(strict_types=1); namespace Anna\ViewModelExample\ViewModel; use Magento\Framework\Phrase; use Magento\Framework\View\Element\Block\ArgumentInterface; class Hello implements ArgumentInterface { public function saySomething(): Phrase { return __('Hello!'); } } |
Kolejnym krokiem będzie podpięcie modelu widoku do wybranego bloku w konfiguracji layoutu. Dostęp do wszystkich stron daje nam plik layoutu o nazwie default.xml. W katalogu modułu view/frontend/layout utworzyłam plik default.xml o następującej zawartości:
|
1 2 3 4 5 6 7 8 9 10 11 12 13 |
<?xml version='1.0' encoding="utf-8" ?> <page xmlns:xsi="http://www.w3.org/2001/XMLSchema-instance" xsi:noNamespaceSchemaLocation="urn:magento:framework:View/Layout/etc/page_configuration.xsd"> <body> <referenceContainer name="header-wrapper"> <block class="Magento\Framework\View\Element\Template" name="example_block" after="logo" template="Anna_ViewModelExample::example.phtml"> <arguments> <argument name="hello_view_model" xsi:type="object">Anna\ViewModelExample\ViewModel\Hello</argument> </arguments> </block> </referenceContainer> </body> </page> |
Tutaj w zależności od potrzeb albo używamy <referenceBlock>, albo elementu <block>. W moim przykładzie dodaje do konfiguracji layoutu nowy blok. Wykorzystam domyślną klasę bloku, którą udostępnia Magento: Magento\Framework\View\Element\Template. Dla elementu <block> dodajmy element podrzędny <arguments>, a wewnątrz niego element <argument>, który posiada następujące atrybuty:
- name — nazwa, pod którą będziemy się odnosić do modelu widoku w pliku .phtml,
- xsi:type — tutaj typem przekazywanego argumentu jest obiekt, więc atrybut dostaje wartość object,
Wewnątrz elementu <argument> podajemy ścieżkę do naszej klasy view model.
Użycie view modelu w pliku .phtml:
|
1 2 3 4 5 6 7 |
<?php /** @var Magento\Framework\View\Element\Template $block */ /** @var Anna\ViewModelExample\ViewModel\Hello $viewModel */ $viewModel = $block->getHelloViewModel(); ?> <p class="info"><?php echo $viewModel->saySomething(); ?></p> |
Przyjrzyjmy się bliżej atrybutowi name dla konfiguracji view modelu. Jaką podajemy mu wartość. Ważne jest tutaj nazewnictwo, bo od tego zależy jak później będziemy mogli odnieść się do klasy model widoku w pliku .phtml. W przedstawionym przykładzie nasza nazwa „hello_view_model” posiada znaki „_” i małe litery. Jeśli zdefiniujemy nazwę w ten sposób, będziemy mogli do modelu widoku odwoływać się na dwa sposoby:
|
1 2 3 4 |
// W każdym przypadku możemy użyć: $viewModel = $block->getData('hello_view_model'); // Jeśli nazwa składa się z małych liter i "_" $viewModel = $block->getHelloViewModel(); |
W przypadku, gdy użyjemy takich nazw jak: „hello_viEw_model” czy „hello_View_Model„, to odwołanie w stylu $block->getHelloViewModel() zwróci nam wartość null!
Przeglądając inne moduły, można zauważyć, że często dla view modelu stosowana jest nazwa „view_model„. Jednak taka nazwa nic nie mówi o samym modelu, a często przecież możemy korzystać z wielu klas tego typu!
Przykład z Magento
Weźmy przykład z formularza do tworzenia Credit Memo. Funkcjonalność ta należy do modułu Magento_Sales.

Ta strona korzysta z klasy view modelu, który zwraca listę elementów, produktów, w postaci gotowej do wyrenderowania przez widok:
|
1 2 3 4 5 6 7 8 9 10 11 12 13 14 15 16 17 18 19 20 21 22 23 24 25 26 27 28 29 30 31 32 33 34 35 36 37 38 39 40 41 42 43 44 45 46 47 48 49 50 51 52 53 54 55 56 57 58 59 60 61 62 63 64 65 66 67 68 69 70 71 |
declare(strict_types=1); namespace Magento\Sales\ViewModel\CreditMemo\Create; use Magento\Framework\View\Element\Block\ArgumentInterface; use Magento\Sales\Block\Adminhtml\Order\Creditmemo\Create\Items; use Magento\Sales\Model\Convert\OrderFactory; use Magento\Sales\Model\Convert\Order as ConvertOrder; use Magento\Sales\Model\Order\Creditmemo\Item; /** * View model to return creditmemo items for rendering */ class ItemsToRender implements ArgumentInterface { /** * @var Items */ private $items; /** * @var ConvertOrder */ private $converter; /** * @param Items $items * @param OrderFactory $convertOrderFactory */ public function __construct( Items $items, OrderFactory $convertOrderFactory ) { $this->items = $items; $this->converter = $convertOrderFactory->create(); } /** * Return creditmemo items for rendering and make sure all its parents are included * * @return Item[] */ public function getItems(): array { $creditMemo = null; $parents = []; $items = []; foreach ($this->items->getCreditmemo()->getAllItems() as $item) { if (!$creditMemo) { $creditMemo = $item->getCreditmemo(); } $orderItem = $item->getOrderItem(); if ($orderItem->getChildrenItems()) { $parents[] = $orderItem->getItemId(); } } foreach ($this->items->getCreditmemo()->getAllItems() as $item) { $orderItemParent = $item->getOrderItem()->getParentItem(); if ($orderItemParent && !in_array($orderItemParent->getItemId(), $parents)) { $itemParent = $this->converter->itemToCreditmemoItem($orderItemParent); $itemParent->setCreditmemo($creditMemo) ->setParentId($creditMemo->getId()) ->setStoreId($creditMemo->getStoreId()); $items[] = $itemParent; $parents[] = $orderItemParent->getItemId(); } $items[] = $item; } return $items; } } |
Przedstawiony plik widoku modelu używany jest na dwóch stronach, których layouty są zdefiniowane w pliku sales_order_creditmemo_updateqty.xml oraz w pliku sales_order_creditmemo_new.xml. Przedstawię tutaj zawartość pliku sales_order_creditmemo_new.xml, która jest następująca:
|
1 2 3 4 5 6 7 8 9 10 11 12 13 14 15 16 17 18 19 20 21 22 23 24 25 26 27 28 |
<?xml version="1.0"?> <!-- /** * Copyright © Magento, Inc. All rights reserved. * See COPYING.txt for license details. */ --> <page xmlns:xsi="http://www.w3.org/2001/XMLSchema-instance" xsi:noNamespaceSchemaLocation="urn:magento:framework:View/Layout/etc/page_configuration.xsd"> <update handle="sales_order_item_price"/> <body> <block class="Magento\Sales\Block\Adminhtml\Order\Creditmemo\Create\Items" name="order_items" template="Magento_Sales::order/creditmemo/create/items.phtml"> <arguments> <argument name="viewModel" xsi:type="object">Magento\Sales\ViewModel\CreditMemo\Create\UpdateTotalsButton</argument> <argument name="itemsToRenderViewModel" xsi:type="object">Magento\Sales\ViewModel\CreditMemo\Create\ItemsToRender</argument> </arguments> <block class="Magento\Sales\Block\Adminhtml\Items\Renderer\DefaultRenderer" name="order_items.default" as="default" template="Magento_Sales::order/creditmemo/create/items/renderer/default.phtml"/> <block class="Magento\Sales\Block\Adminhtml\Items\Column\Qty" name="column_qty" template="Magento_Sales::items/column/qty.phtml" group="column"/> <block class="Magento\Sales\Block\Adminhtml\Items\Column\Name" name="column_name" template="Magento_Sales::items/column/name.phtml" group="column"/> <block class="Magento\Framework\View\Element\Text\ListText" name="order_item_extra_info"/> <block class="Magento\Sales\Block\Adminhtml\Order\Creditmemo\Totals" name="creditmemo_totals" template="Magento_Sales::order/totals.phtml"> <block class="Magento\Sales\Block\Adminhtml\Order\Creditmemo\Create\Adjustments" name="adjustments" template="Magento_Sales::order/creditmemo/create/totals/adjustments.phtml"/> <block class="Magento\Sales\Block\Adminhtml\Order\Totals\Tax" name="tax" template="Magento_Sales::order/totals/tax.phtml"/> </block> <container name="submit_before" label="Submit Before"/> <container name="submit_after" label="Submit After"/> </block> </body> </page> |
Wyróżnione linie 13 i 14 stanowią przykłady jak dodać model widoku dla wybranej klasy bloku. Jak widzimy, dla danego bloku możemy skonfigurować wiele modeli widoków.
Plik .pthml, który nas interesuje, znajduje się w pliku view/adminhtml/templates/order/creditmemo/create/items.phtml. Oto jego początkowy fragment:
|
1 2 3 4 5 6 7 8 9 10 11 12 13 14 15 16 17 18 |
<?php /** * Copyright © Magento, Inc. All rights reserved. * See COPYING.txt for license details. */ /* @var \Magento\Sales\Block\Adminhtml\Order\Creditmemo\Create\Items $block */ /** @var \Magento\Framework\View\Helper\SecureHtmlRenderer $secureRenderer */ ?> <?php /** @var Magento\Sales\ViewModel\CreditMemo\Create\UpdateTotalsButton $viewModel */ $viewModel = $block->getData('viewModel'); /** @var Magento\Sales\ViewModel\CreditMemo\Create\ItemsToRender $itemsToRenderViewModel */ $itemsToRenderViewModel = $block->getData('itemsToRenderViewModel'); $_items = $itemsToRenderViewModel->getItems(); $commentText = $block->getCreditmemo()->getCommentText(); ?> <!-- (...) --> |
Ze względu na konfigurację, jaka jest w pliku layoutu, do klas view modeli można odwołać się tylko poprzez użycie metody getData() klasy bloku.
Przykład z Magento: dodanie view modelu za pomocą pluginu
Ciekawym przykład znajduje się w module Magento_Contact. Tam ustawienie view modelu odbywa się poprzez użycie pluginu.
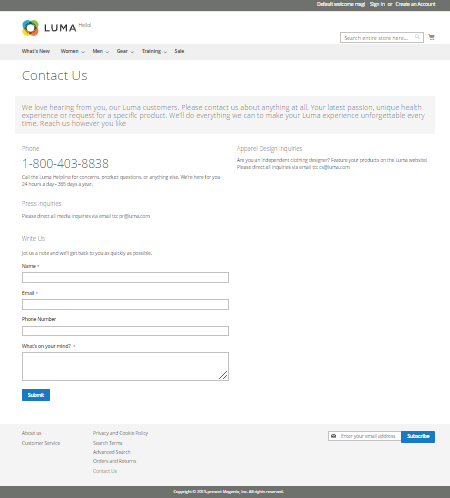
Strona kontaktowa magento, obsługiwana jest przez ścieżkę contact/index/index (normalnie index/index w adresie możemy spokojnie pominąć). W pliku layoutu dla tej strony jest określony w pliku contact_index_index.xml. Mamy tutaj konfigurację bloku odpowiedzialnego za wyświetlanie formularza:
|
1 2 3 4 5 6 7 8 9 10 11 12 13 14 15 16 17 18 19 |
<?xml version="1.0"?> <!-- /** * Copyright © Magento, Inc. All rights reserved. * See COPYING.txt for license details. */ --> <page xmlns:xsi="http://www.w3.org/2001/XMLSchema-instance" layout="1column" xsi:noNamespaceSchemaLocation="urn:magento:framework:View/Layout/etc/page_configuration.xsd"> <head> <title>Contact Us</title> </head> <body> <referenceContainer name="content"> <block class="Magento\Contact\Block\ContactForm" name="contactForm" template="Magento_Contact::form.phtml"> <container name="form.additional.info" label="Form Additional Info"/> </block> </referenceContainer> </body> </page> |
W pliku etc/frontend/di.xml modułu Magento_Contact fragment odpowiadający za konfigurację pluginu jest następujący:
|
1 2 3 |
<type name="Magento\Contact\Block\ContactForm"> <plugin name="set_view_model" type="Magento\Contact\Plugin\UserDataProvider\ViewModel" /> </type> |
Przejdźmy teraz do klasy pluginu, która zajmuje się ustawianiem view modelu:
|
1 2 3 4 5 6 7 8 9 10 11 12 13 14 15 16 17 18 19 20 21 22 23 24 25 26 27 28 29 30 31 32 33 34 35 36 37 38 39 40 41 42 43 44 45 46 47 48 49 50 51 |
<?php /** * Copyright © Magento, Inc. All rights reserved. * See COPYING.txt for license details. */ declare(strict_types=1); namespace Magento\Contact\Plugin\UserDataProvider; use Magento\Framework\DataObject; use Magento\Framework\View\Element\Block\ArgumentInterface; use Magento\Framework\View\Element\BlockInterface; /** * Sets the view model */ class ViewModel { /** * Key `view_model` */ private const VIEW_MODEL = 'view_model'; /** * @var ArgumentInterface */ private $viewModel; /** * @param ArgumentInterface $viewModel */ public function __construct(ArgumentInterface $viewModel) { $this->viewModel = $viewModel; } /** * Sets the view model before rendering to HTML * * @param DataObject|BlockInterface $block * @return null */ public function beforeToHtml(DataObject $block) { if (!$block->hasData(self::VIEW_MODEL)) { $block->setData(self::VIEW_MODEL, $this->viewModel); } return null; } } |
Powyższy kod ustawia wartość view_model dla bloku. Za pomocą pluginu typu before, zanim dojdzie do wygenerowania kodu html, ustawiany jest view model. Ze względu na wybraną nazwę 'view_model’ klasa model widoku będzie dostępna zarówno poprzez getData(’view_model’) jak i metodę getViewModel().
Do konstruktora view modelu podawana jest odpowiednia klasa implementująca interfejs ArgumentInterface, która w pliku etc/frontend/di.xml posiada taką konfigurację:
|
1 2 3 4 5 |
<type name="Magento\Contact\Plugin\UserDataProvider\ViewModel"> <arguments> <argument name="viewModel" xsi:type="object">Magento\Contact\ViewModel\UserDataProvider</argument> </arguments> </type> |
Interesująca nas klasa modelu widoku ma następującą zawartość:
|
1 2 3 4 5 6 7 8 9 10 11 12 13 14 15 16 17 18 19 20 21 22 23 24 25 26 27 28 29 30 31 32 33 34 35 36 37 38 39 40 41 42 43 44 45 46 47 48 49 50 51 52 53 54 55 56 57 58 59 60 61 62 63 64 65 66 67 68 69 70 71 72 |
<?php /** * Copyright © Magento, Inc. All rights reserved. * See COPYING.txt for license details. */ namespace Magento\Contact\ViewModel; use Magento\Contact\Helper\Data; use Magento\Framework\View\Element\Block\ArgumentInterface; /** * Provides the user data to fill the form. */ class UserDataProvider implements ArgumentInterface { /** * @var Data */ private $helper; /** * UserDataProvider constructor. * @param Data $helper */ public function __construct( Data $helper ) { $this->helper = $helper; } /** * Get user name * * @return string */ public function getUserName() { return $this->helper->getPostValue('name') ?: $this->helper->getUserName(); } /** * Get user email * * @return string */ public function getUserEmail() { return $this->helper->getPostValue('email') ?: $this->helper->getUserEmail(); } /** * Get user telephone * * @return string */ public function getUserTelephone() { return $this->helper->getPostValue('telephone'); } /** * Get user comment * * @return string */ public function getUserComment() { return $this->helper->getPostValue('comment'); } } |
Wspomniana klasa dostarcza klasie bloku odpowiednie dane. Dane następnie są wykorzystywane odpowiednio do wypełnienia pól formularza.
Przykład z Magento: użycie widoku modelu z komponentem UI
Tym razem zajrzyjmy do modułu Magento_Cms. W adminie strona przedstawiająca listę zdefiniowanych stron cms jest dostępna z poziomu menu Content ⮞ Elements ⮞ Pages. Ostatnia kolumna grida, kolumna Action zawiera listę akcji. Konfiguracja layoutu tej strony, mieszcząca się w pliku cms_page_index.xml, wygląda następująco:
|
1 2 3 4 5 6 7 8 9 10 11 12 13 14 15 16 17 18 19 20 |
<?xml version="1.0"?> <!-- /** * Copyright © Magento, Inc. All rights reserved. * See COPYING.txt for license details. */ --> <page xmlns:xsi="http://www.w3.org/2001/XMLSchema-instance" xsi:noNamespaceSchemaLocation="urn:magento:framework:View/Layout/etc/page_configuration.xsd"> <update handle="styles"/> <body> <referenceContainer name="content"> <uiComponent name="cms_page_listing"/> <block class="Magento\Backend\Block\Template" template="Magento_Cms::url_filter_applier.phtml" name="page_list_url_filter_applier"> <arguments> <argument name="listing_namespace" xsi:type="string">cms_page_listing</argument> </arguments> </block> </referenceContainer> </body> </page> |
Za konfigurację grida odpowiada komponent ui cms_page_listing. Jego konfiguracja znajduje się w pliku cms_page_listing.xml, który znajdziemy w podkatalogu modułu view/adminhtml/ui_component. Fragment, który odpowiada za wyświetlenie kolumny z akcjami, jest następujący:
|
1 2 3 4 5 6 7 8 9 |
<!--- (...) --> <actionsColumn name="actions" class="Magento\Cms\Ui\Component\Listing\Column\PageActions"> <settings> <indexField>page_id</indexField> <resizeEnabled>false</resizeEnabled> <resizeDefaultWidth>107</resizeDefaultWidth> </settings> </actionsColumn> <!--- (...) --> |
W tej konfiguracji podana klasa Magento\Cms\Ui\Component\Listing\Column\PageActions dostarcza dane do wyświetlenia listy linków. Mamy następujące akcje:

Delete — usunięcie wybranej strony, z wcześniejszym potwierdzeniem,
View — udostępnia link do strony na froncie, aby możliwy był jej podgląd.
Generowanie linków do frontu na stronie admina nie jest standardowym zadaniem, więc oczywiście ta funkcjonalność trafiła do osobnej klasy. To właśnie zadanie zostało oddelegowane do klasy Magento\Cms\ViewModel\Page\Grid\UrlBuilder. Ten model widoku, jest podawany jako zależność w postaci argumentu konstruktora:
|
1 2 3 4 5 6 7 8 9 10 11 12 13 14 15 16 17 18 19 20 21 22 23 24 25 26 27 28 29 30 31 32 33 34 35 36 37 38 39 40 41 42 43 44 45 46 47 48 49 50 51 52 53 54 55 56 57 58 59 60 61 62 63 64 65 66 67 68 69 70 71 72 73 74 75 76 77 78 |
<?php /** * Copyright © Magento, Inc. All rights reserved. * See COPYING.txt for license details. */ namespace Magento\Cms\Ui\Component\Listing\Column; use Magento\Cms\Block\Adminhtml\Page\Grid\Renderer\Action\UrlBuilder; use Magento\Framework\App\ObjectManager; use Magento\Framework\Escaper; use Magento\Framework\UrlInterface; use Magento\Framework\View\Element\UiComponent\ContextInterface; use Magento\Framework\View\Element\UiComponentFactory; use Magento\Ui\Component\Listing\Columns\Column; /** * Class prepare Page Actions */ class PageActions extends Column { /** (...) */ /** * @param ContextInterface $context * @param UiComponentFactory $uiComponentFactory * @param UrlBuilder $actionUrlBuilder * @param UrlInterface $urlBuilder * @param array $components * @param array $data * @param string $editUrl * @param \Magento\Cms\ViewModel\Page\Grid\UrlBuilder|null $scopeUrlBuilder */ public function __construct( ContextInterface $context, UiComponentFactory $uiComponentFactory, UrlBuilder $actionUrlBuilder, UrlInterface $urlBuilder, array $components = [], array $data = [], $editUrl = self::CMS_URL_PATH_EDIT, \Magento\Cms\ViewModel\Page\Grid\UrlBuilder $scopeUrlBuilder = null ) { $this->urlBuilder = $urlBuilder; $this->actionUrlBuilder = $actionUrlBuilder; $this->editUrl = $editUrl; parent::__construct($context, $uiComponentFactory, $components, $data); $this->scopeUrlBuilder = $scopeUrlBuilder ?: ObjectManager::getInstance() ->get(\Magento\Cms\ViewModel\Page\Grid\UrlBuilder::class); } /** * @inheritDoc */ public function prepareDataSource(array $dataSource) { if (isset($dataSource['data']['items'])) { foreach ($dataSource['data']['items'] as & $item) { $name = $this->getData('name'); /** (...) */ if (isset($item['identifier'])) { $item[$name]['preview'] = [ 'href' => $this->scopeUrlBuilder->getUrl( $item['identifier'], isset($item['_first_store_id']) ? $item['_first_store_id'] : null, isset($item['store_code']) ? $item['store_code'] : null ), 'label' => __('View'), 'target' => '_blank' ]; } } } return $dataSource; } /** (...) */ } |
A oto jak budowane są linki do bezpośredniego przeglądania strony cms na froncie, klasa Magento\Cms\ViewModel\Page\Grid\UrlBuilder:
|
1 2 3 4 5 6 7 8 9 10 11 12 13 14 15 16 17 18 19 20 21 22 23 24 25 26 27 28 29 30 31 32 33 34 35 36 37 38 39 40 41 42 43 44 45 46 47 48 49 50 51 52 53 54 55 56 57 58 59 60 61 62 63 64 65 66 67 68 69 70 71 72 73 74 75 76 77 78 79 80 81 82 83 84 85 86 87 88 89 90 91 92 93 94 95 96 97 98 99 100 101 102 103 104 105 106 107 108 109 110 111 112 |
<?php /** * Copyright © Magento, Inc. All rights reserved. * See COPYING.txt for license details. */ declare(strict_types=1); namespace Magento\Cms\ViewModel\Page\Grid; use Magento\Framework\Url\EncoderInterface; use Magento\Framework\App\ActionInterface; use Magento\Store\Model\StoreManagerInterface; /** * Url builder class used to compose dynamic urls. */ class UrlBuilder { /** * @var \Magento\Framework\UrlInterface */ private $frontendUrlBuilder; /** * @var EncoderInterface */ private $urlEncoder; /** * @var StoreManagerInterface */ private $storeManager; /** * @param \Magento\Framework\UrlInterface $frontendUrlBuilder * @param EncoderInterface $urlEncoder * @param StoreManagerInterface $storeManager */ public function __construct( \Magento\Framework\UrlInterface $frontendUrlBuilder, EncoderInterface $urlEncoder, StoreManagerInterface $storeManager ) { $this->frontendUrlBuilder = $frontendUrlBuilder; $this->urlEncoder = $urlEncoder; $this->storeManager = $storeManager; } /** * Get action url * * @param string $routePath * @param string $scope * @param string $store * @return string */ public function getUrl($routePath, $scope, $store) { if ($scope) { $this->frontendUrlBuilder->setScope($scope); $targetUrl = $this->frontendUrlBuilder->getUrl( $routePath, [ '_current' => false, '_nosid' => true, '_query' => [ StoreManagerInterface::PARAM_NAME => $store ] ] ); $href = $this->frontendUrlBuilder->getUrl( 'stores/store/switch', [ '_current' => false, '_nosid' => true, '_query' => $this->prepareRequestQuery($store, $targetUrl) ] ); } else { $href = $this->frontendUrlBuilder->getUrl( $routePath, [ '_current' => false, '_nosid' => true ] ); } return $href; } /** * Prepare request query * * @param string $store * @param string $href * @return array */ private function prepareRequestQuery(string $store, string $href) : array { $storeView = $this->storeManager->getDefaultStoreView(); $query = [ StoreManagerInterface::PARAM_NAME => $store, ActionInterface::PARAM_NAME_URL_ENCODED => $this->urlEncoder->encode($href) ]; if (null !== $storeView && $storeView->getCode() !== $store) { $query['___from_store'] = $storeView->getCode(); } return $query; } } |
Magento 2: dynamiczna inicjalizacja komponentu UI - Web Programming
2 grudnia 2023 @ 00:26
[…] modelu widoku (ang. view model) przyda nam się do przekazania przetworzonych danych do pliku widoku (pliku […]
Pluginy w Magento 2 - Web Programming
4 grudnia 2023 @ 02:59
[…] Dynamiczne ustawienie view modelu za pomocą pluginu before — przykład dla formularza kontaktu pochodzącego z modułu Magento_Contact dla klasy MagentoContactBlockContactForm. […]